Being a Kodi addict, you may have heard about one of the popular kodi build named Fire TV guru. As the name shows, it is designed by seeing Amazon Fire TV in mind. But not only Fire TV but also Xbox one, PC, Mobile were also supported by Fire TV guru build. Don’t worry about your device. The steps and links are same for Amazon Fire Stick, Windows PC, Mac and Android.
Precautions before installing Fire TV Guru addon
#1:- Make sure you are using a VPN
This is an important precaution you should do before installing kodi add-ons. Not only for Fire TV guru addon but also it is good to use VPN before installing and using any sort of add-ons with kodi. The reasons are different. One important reason is, piracy and copyright issues. Fire TV guru add-ons are controlled by third-party team. The TV shows, movies, sport events etc listed on fire TV guru are completely managed by these third-party people. There will be several built-in channels and videos that may under copy protected law. If your country is strictly against these piracy acts, make sure you hide your IP address through a VPN software.
Another reason is the restriction your ISP made for fire TV guru URLs. If the ISP receives a DMCA notice against the URLs mentioned in Fire TV, they may block you to access such links and channels. So you should bypass such restrictions before accessing these channels and links. So VPN is the best way to do such things.
#2:- Make sure you have active Internet connection
I have seen many people complaining that, during kodi build installs, they are getting many sort of errors. one important reason is because, they try to install kodi without connecting to Internet. kodi build installations require active internet connection for downloading the files over internet. Some builds are bigger in size and it is recommended to use a fast network.
DISCLAIMER: — Here are some of the few stuffs mentioned in FTG webpage regarding its functionalities and stand against copyright. Kodi is a registered trademark of the XBMC Foundation. We are not connected to or in any other way affiliated with XBMC Foundation or XBMC team. All names, logo, products are property of their respective owners. Such items are mentioned only for identification process. All links, addons, skins etc are for educational purpose only and they are not hosted on fire TV guru webpage.
Step by Step Installation guide for Kodi Fire TV guru build
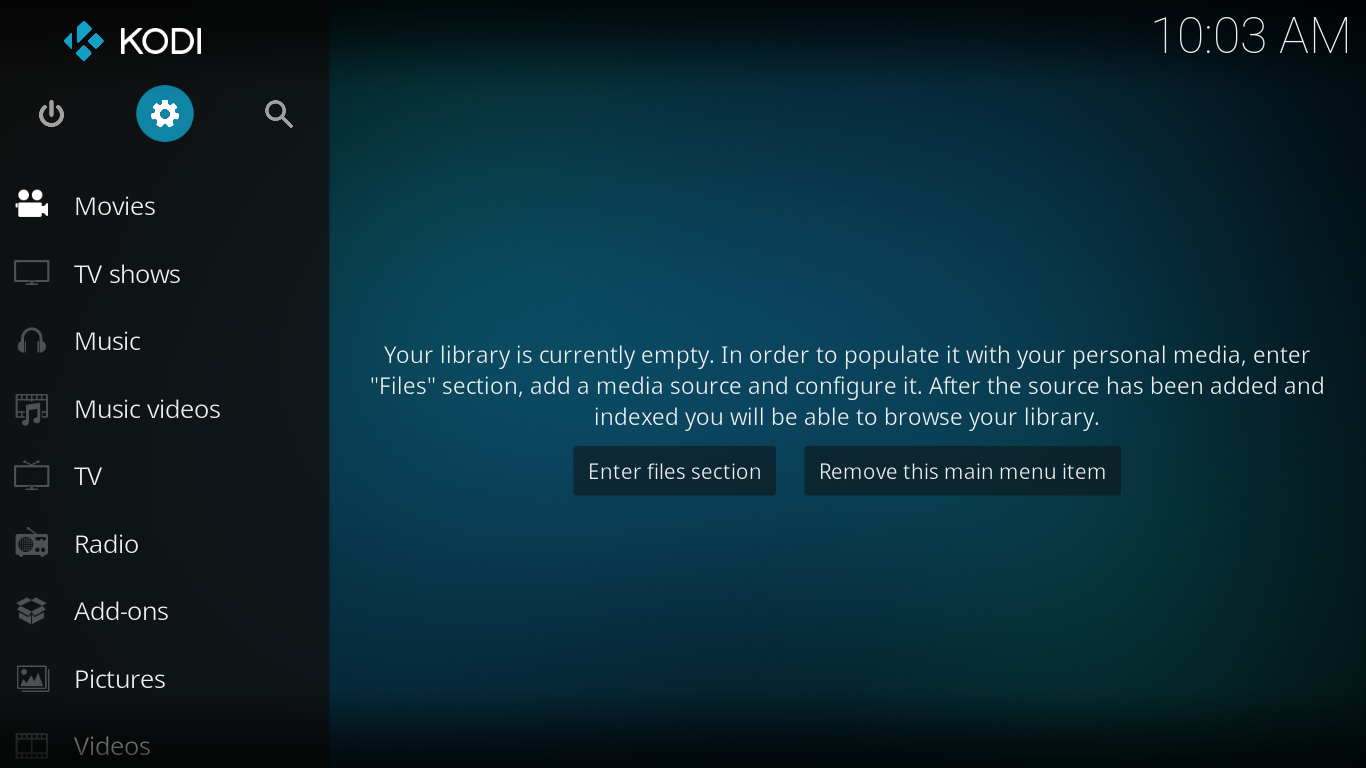
Step 1:- Open Kodi app from your device. You can see a window which looks like below screenshot. Then click on settings icon which is highlighted on the top right corner.
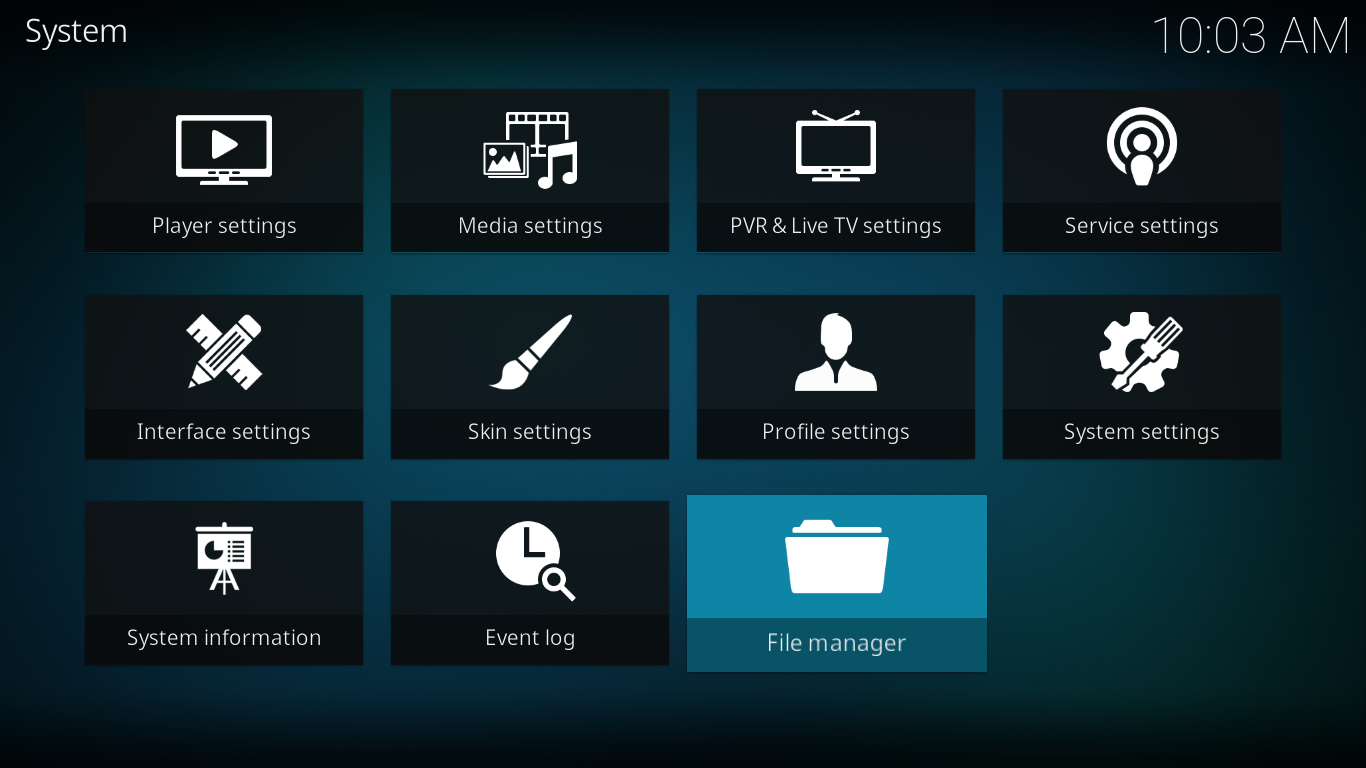
Step 2:- Now you can see a list of options with corresponding images. From there, we need to click on the File Manager option. In all devices, File Manager will be the last option.
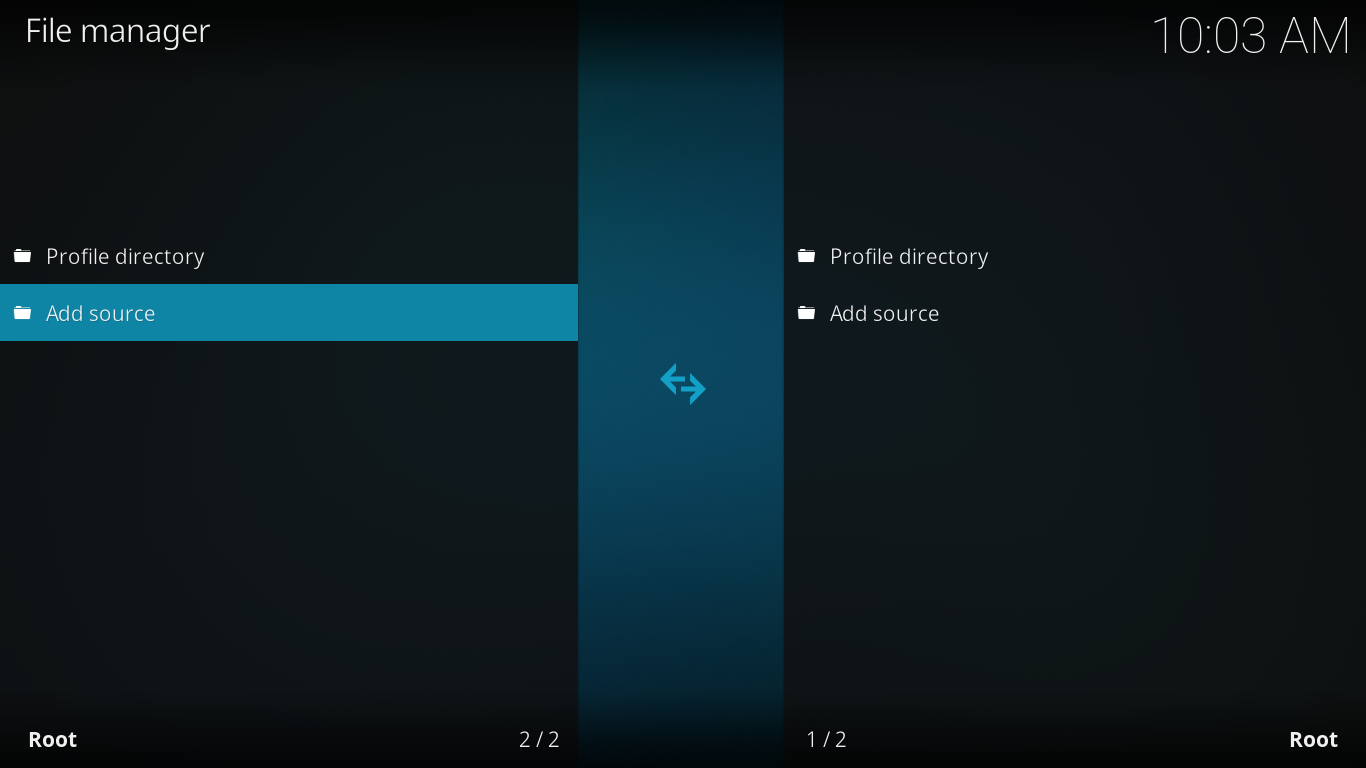
Step 3:- From there, you need to choose “Add Source” option. Click on Add Source using Keyboard, Mouse, Touch screen, console or whatever you use for navigation.
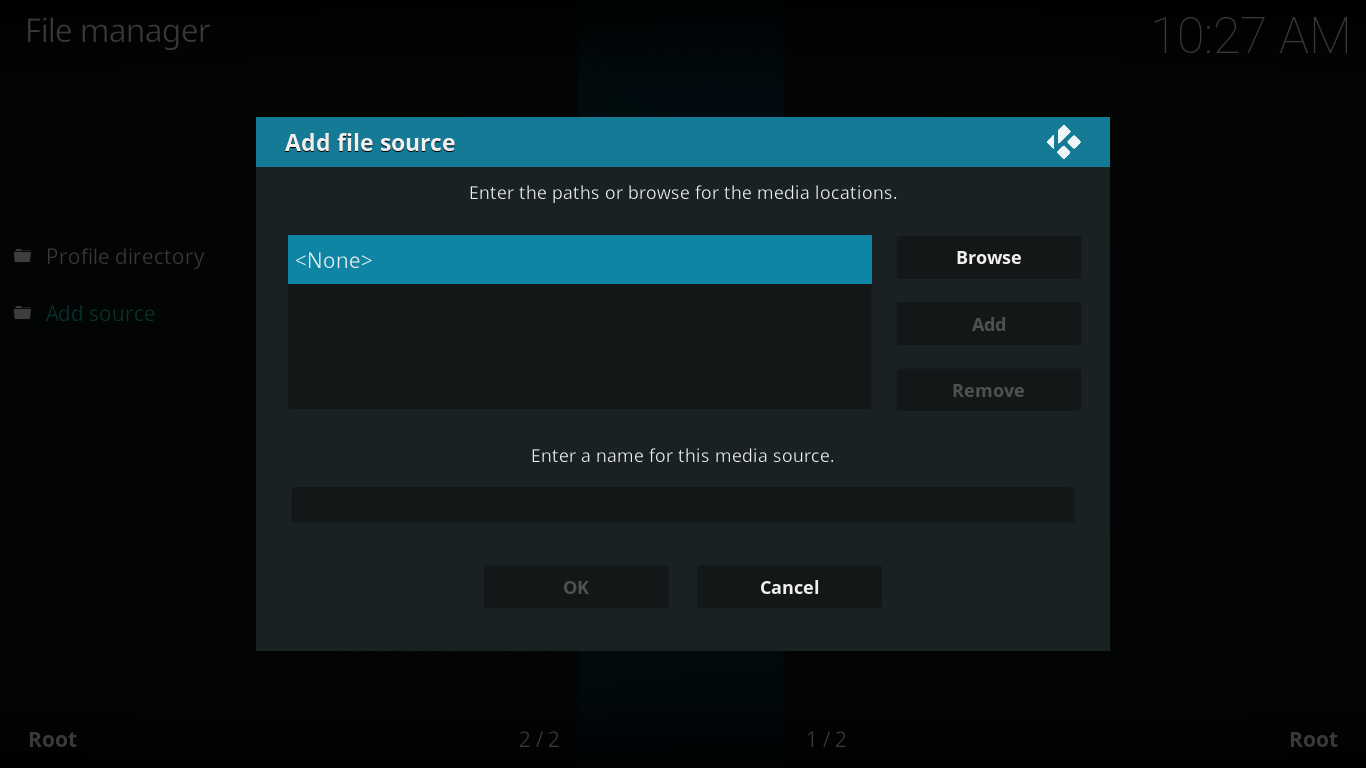
Step 4:- Now there you see a popup window to add the URL. You could see a <None> option by default. Click on that option to add the source.
Step 5:- Now you need to enter the URL. No matter what type of device are you using. Just copy paste the following URL or type it on the path.
URL:- http://firetvguru.net/fire
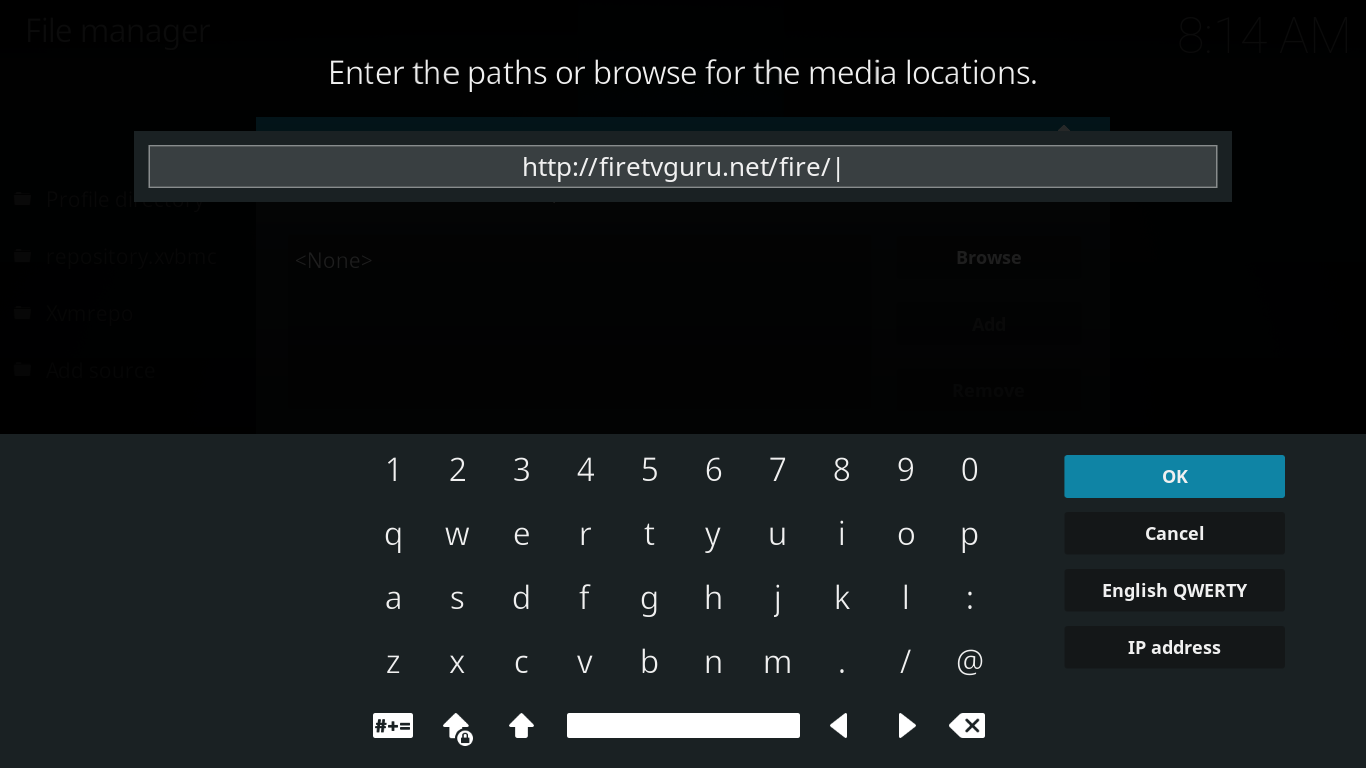
Step 6:- Now give a name you can remember. Here I named it as firetv guru. The naming procedure completely depends on your choice.
Step 7:- Now go back to Home screen, the same what we seen in the first step. Click on Add-ons option which you see on the left side.

Step 8:- After clicking add-ons, you can see a package button on top left corner. Click on that.
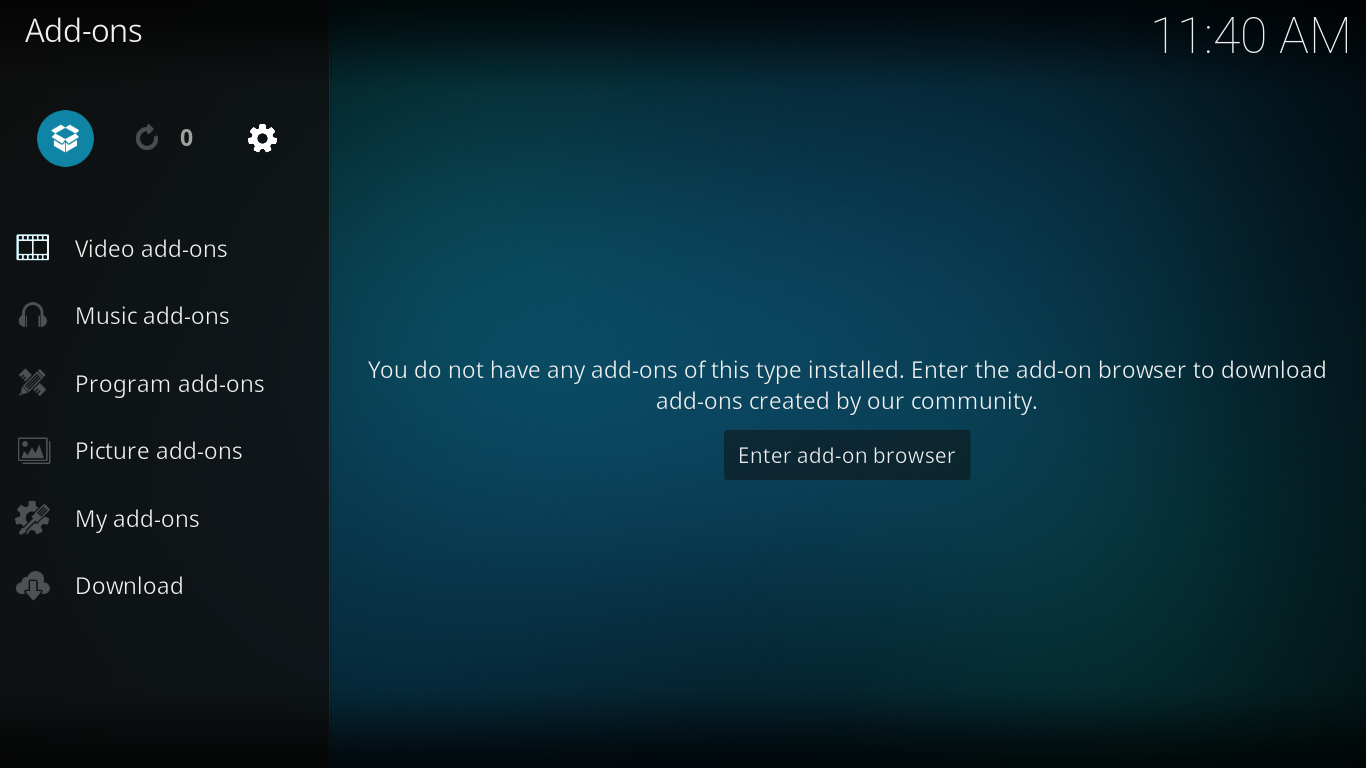
Step 9:- From the list of options, choose “Install from ZIP file”
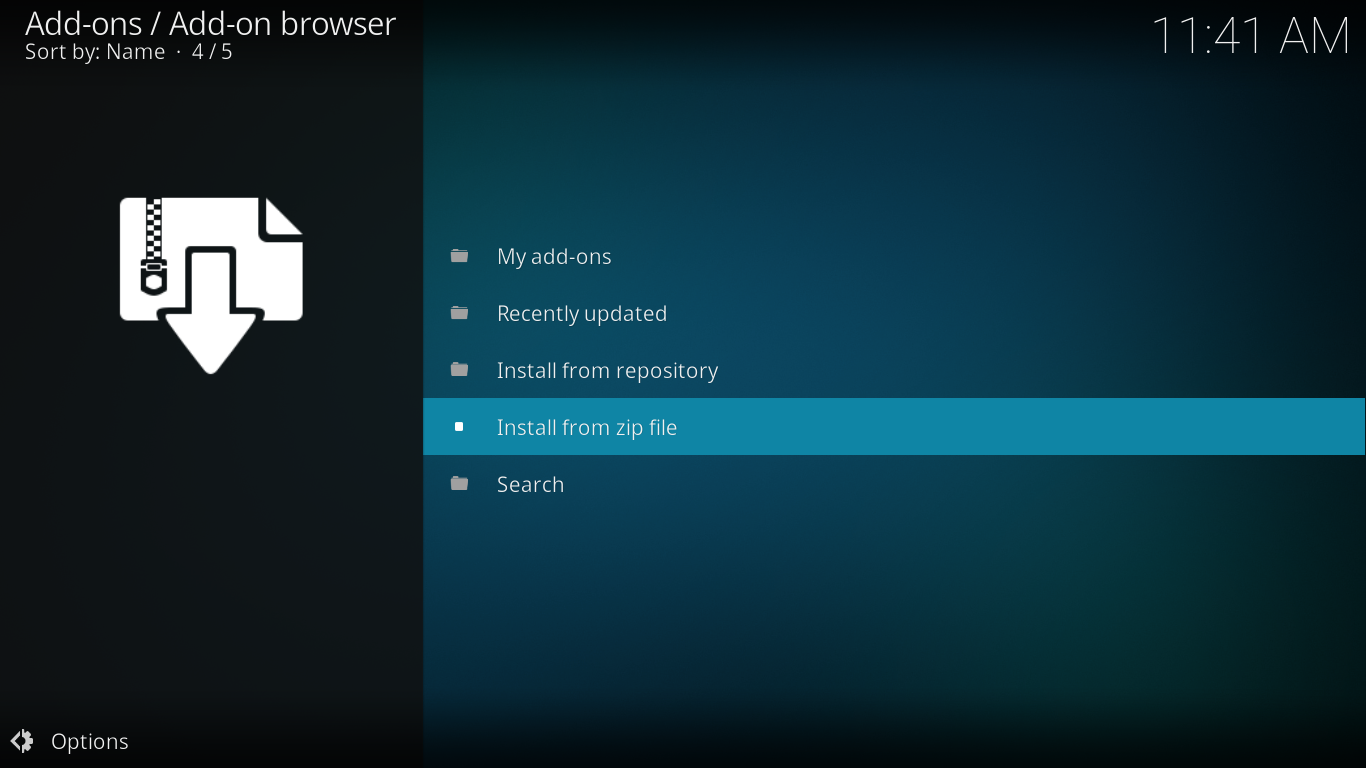
NB: While choosing Install from ZIP File, you may see a warning message showing, Installation from unknown source is restricted. There you can see two boxes named OK and Settings. Click on Settings button and tick “install from unknown sources” option. Now come back from that window and Click on “install from ZIP file” again.
Step 10:- Now choose “firetv guru”. The name may be different if you give a different name in step 6.
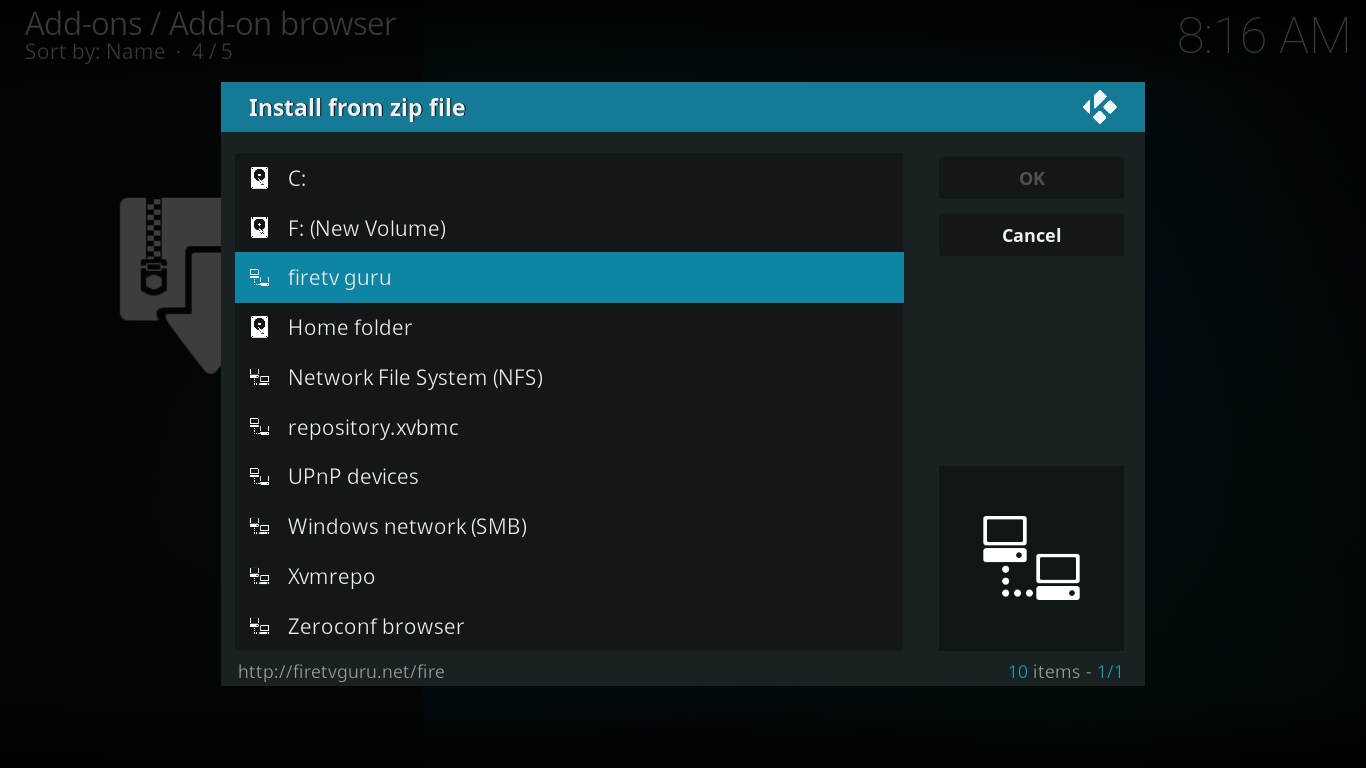
Step 11:- There you can see two repository. Choose the first one named “repository.firetvguru.zip“and click OK button.
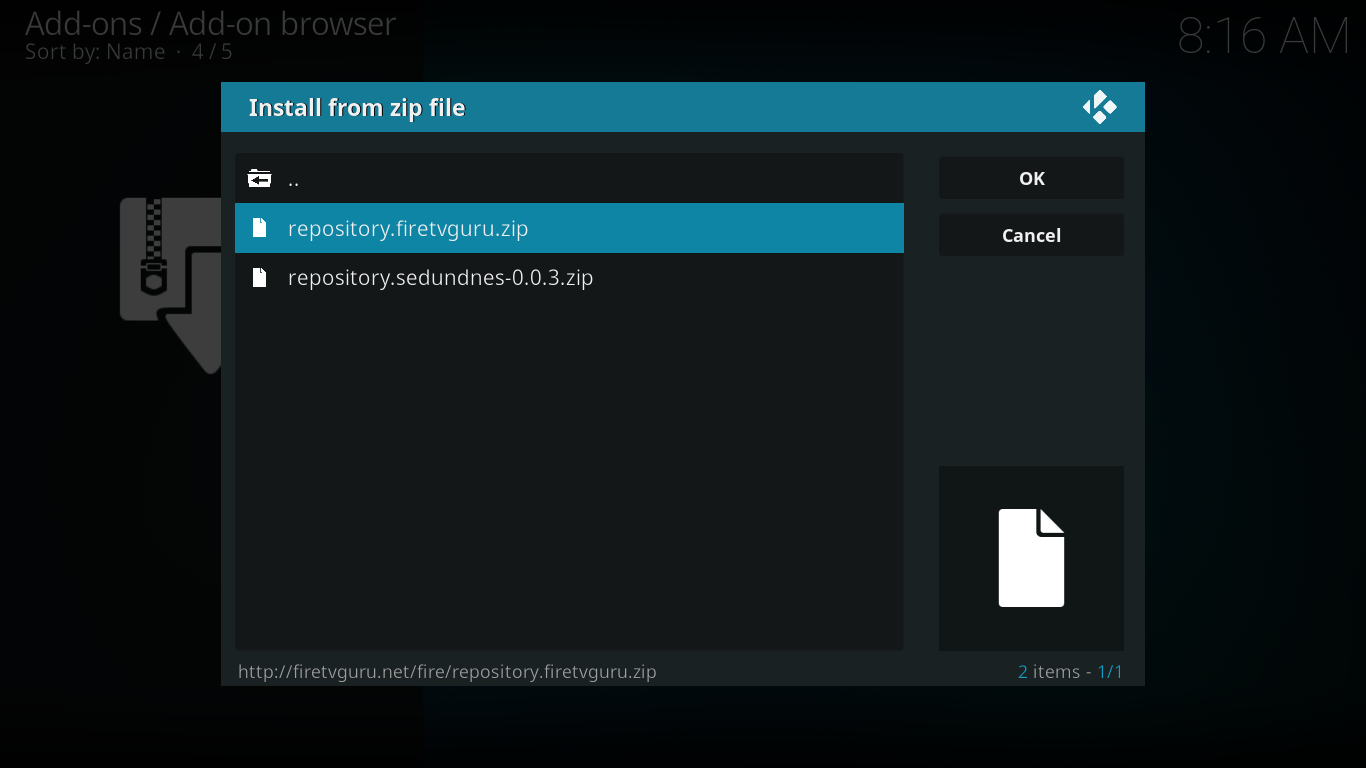
Step 12:- Now wait a few seconds and you can see a notification showing “Fire TV guru repo add-on installed.
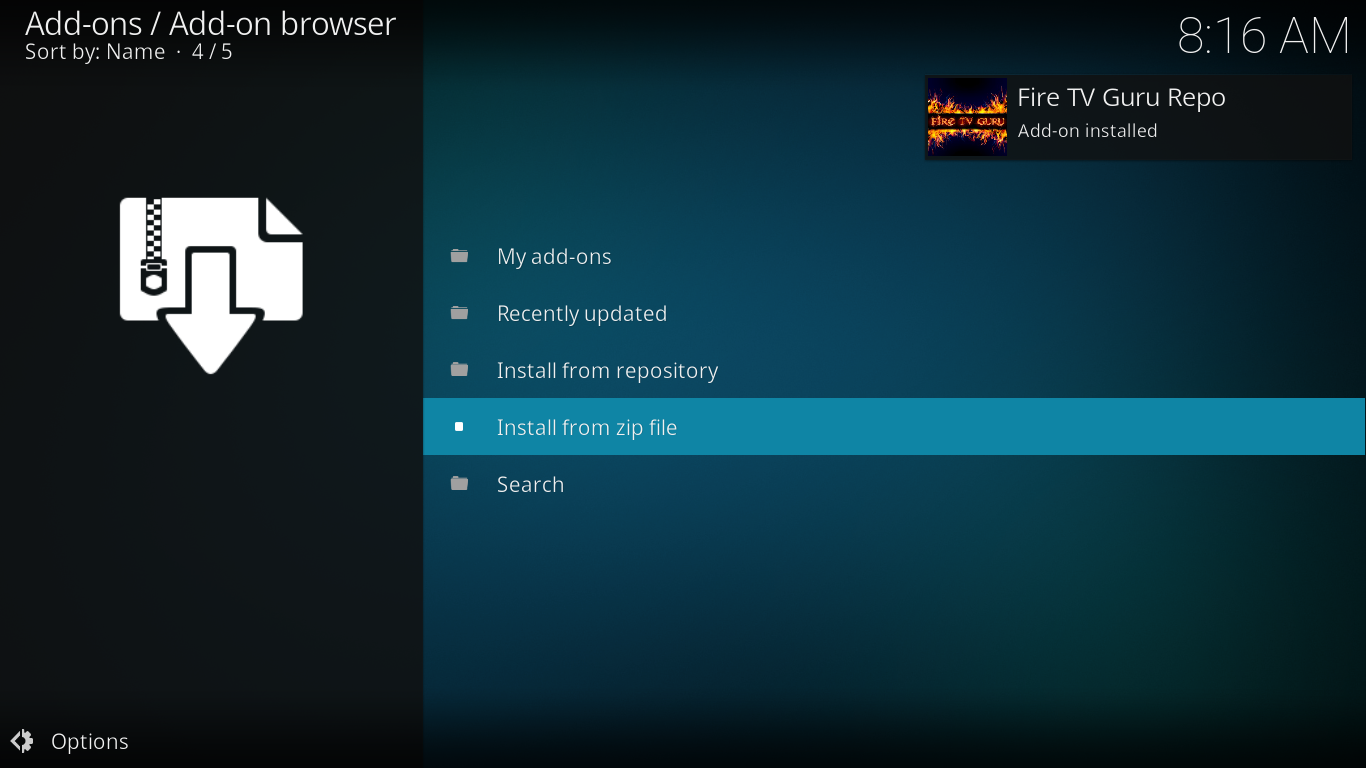
Step 13:- Now click on “Install from repository” just above the “Install from zip file” option. There you can see the repositories you already added. In our case, we have just created the Fire TV Guru repository. So click on “Fire TV Guru Repo” as shown below.
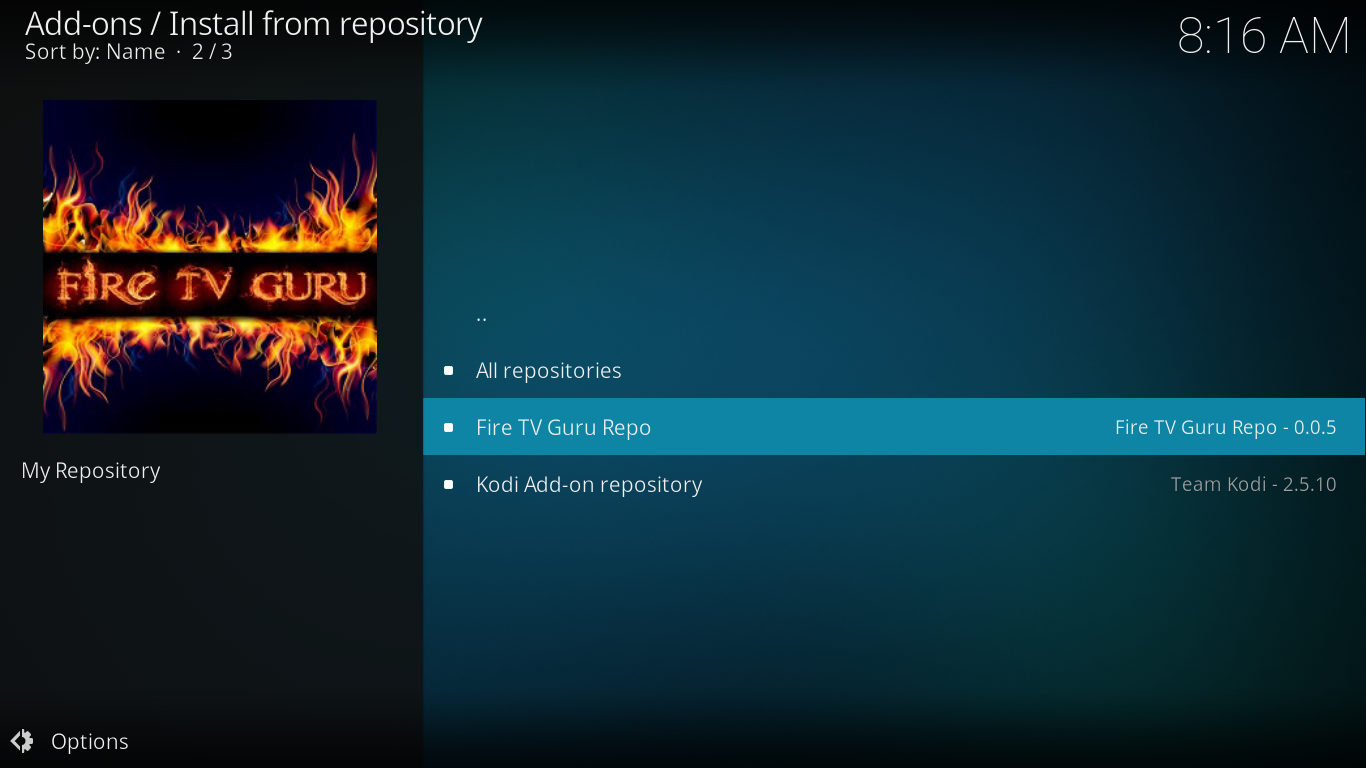
Step 14:- Now click on “Program add-ons“.
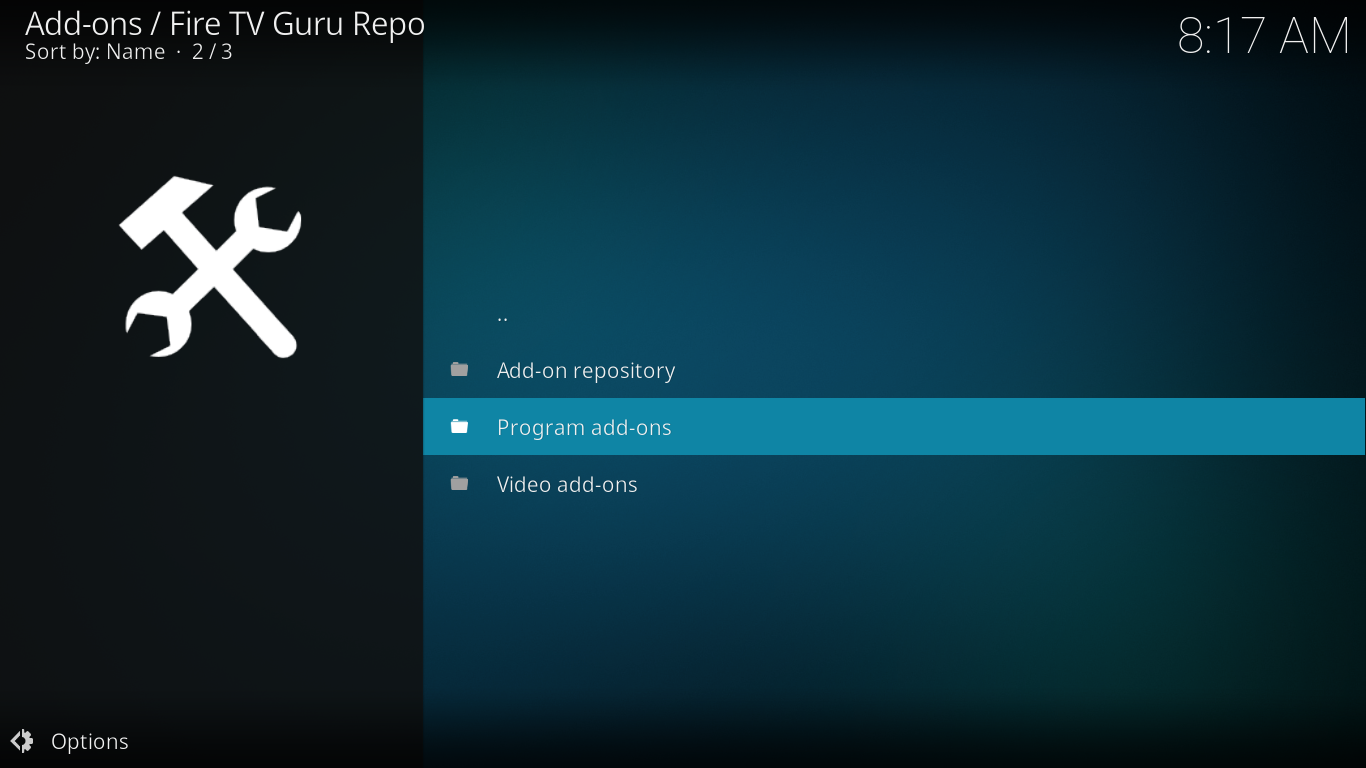
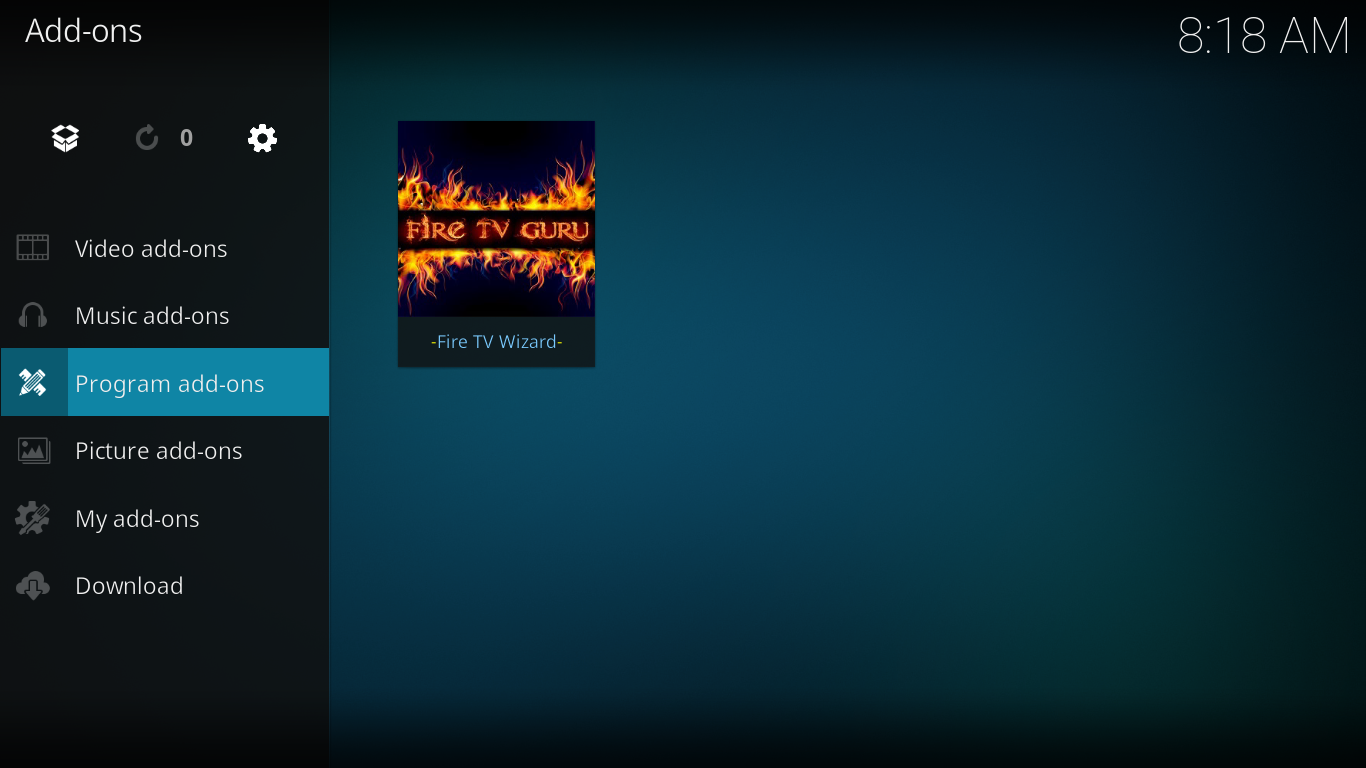
Fire TV Wizard can be downloaded from the program add-ons. So Click on “Fire TV Wizard” as shown below.
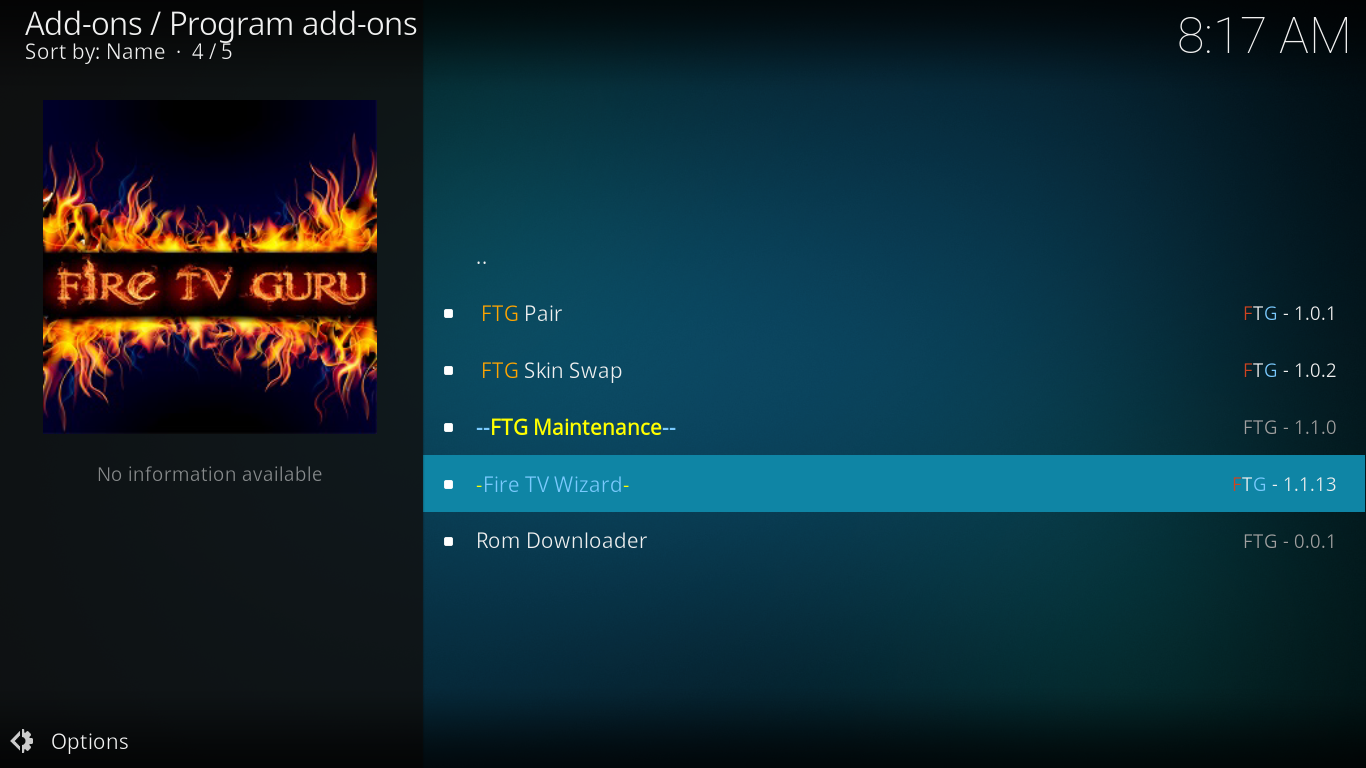
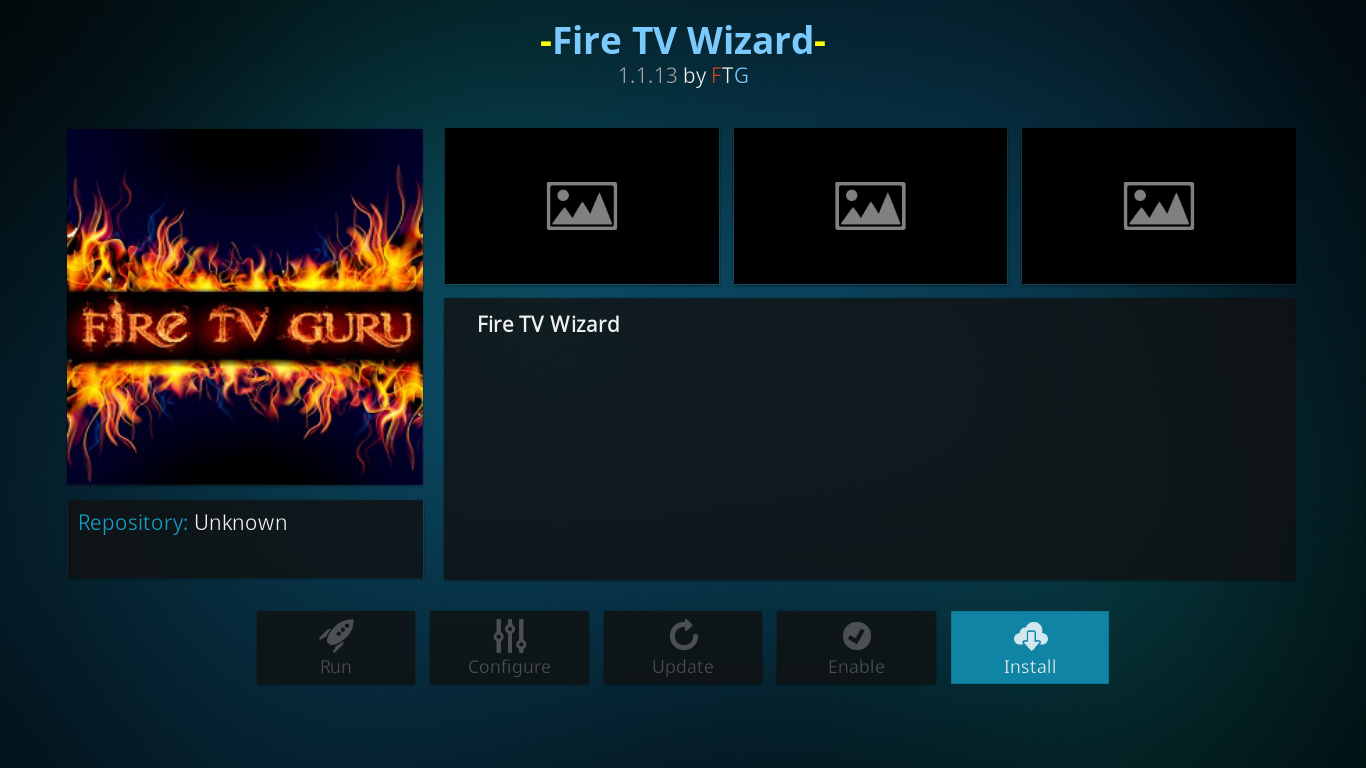
Step 15:- There you can see the install button for installing the Fire TV Wizard. Just click on that and you can see the files getting downloaded.
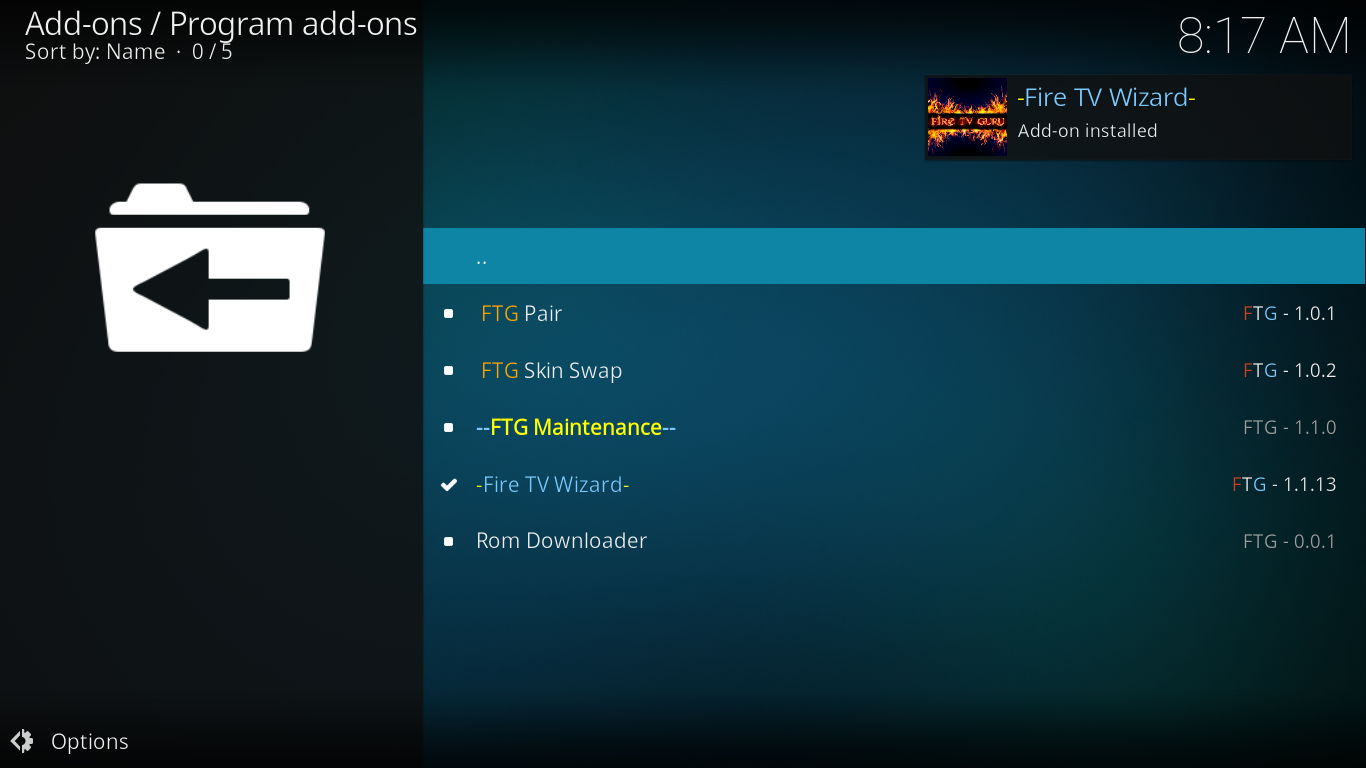
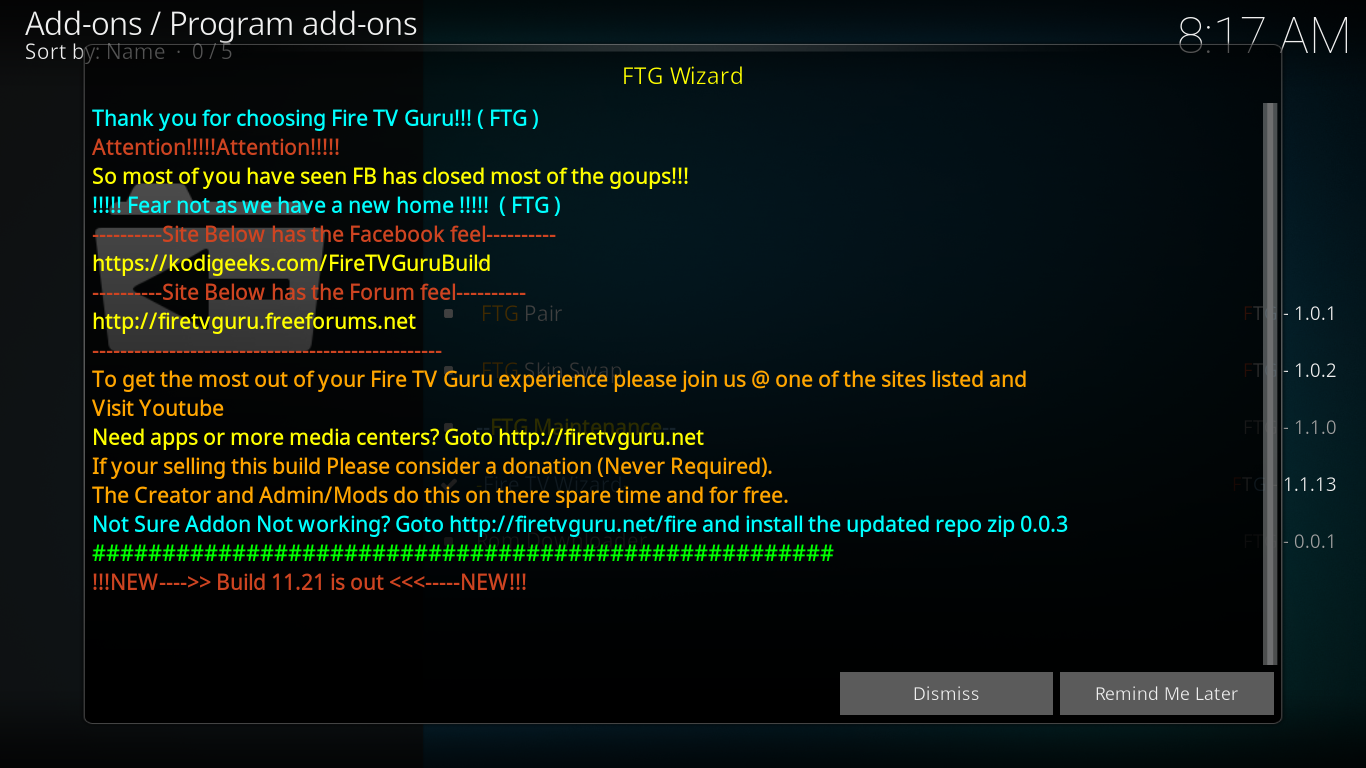
Once your download got finished, you could see a window like below. Just leave it and click on Dismiss button.
Step 16:- Now Come back and Click on the Program add-ons option. If everything goes right, there you can see “Fire TV Wizard” add-on. Click on that.
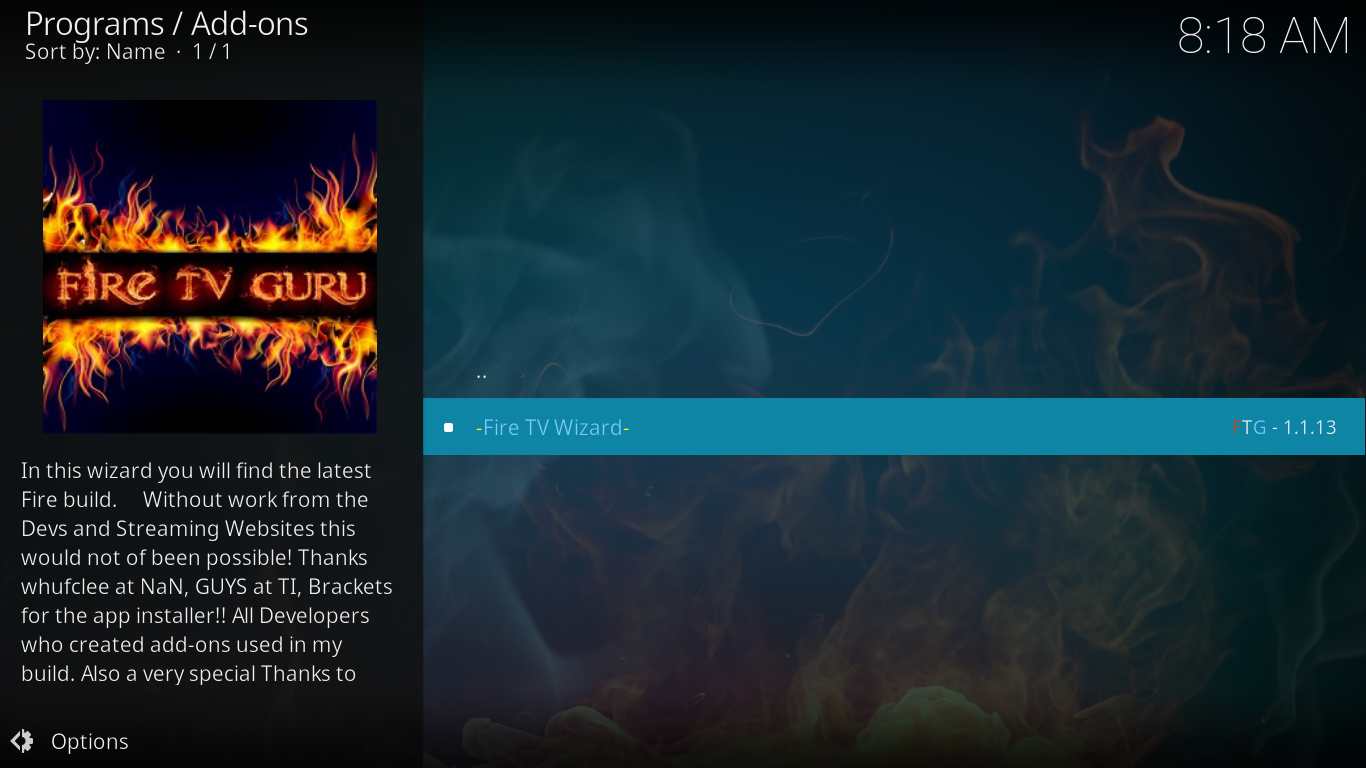
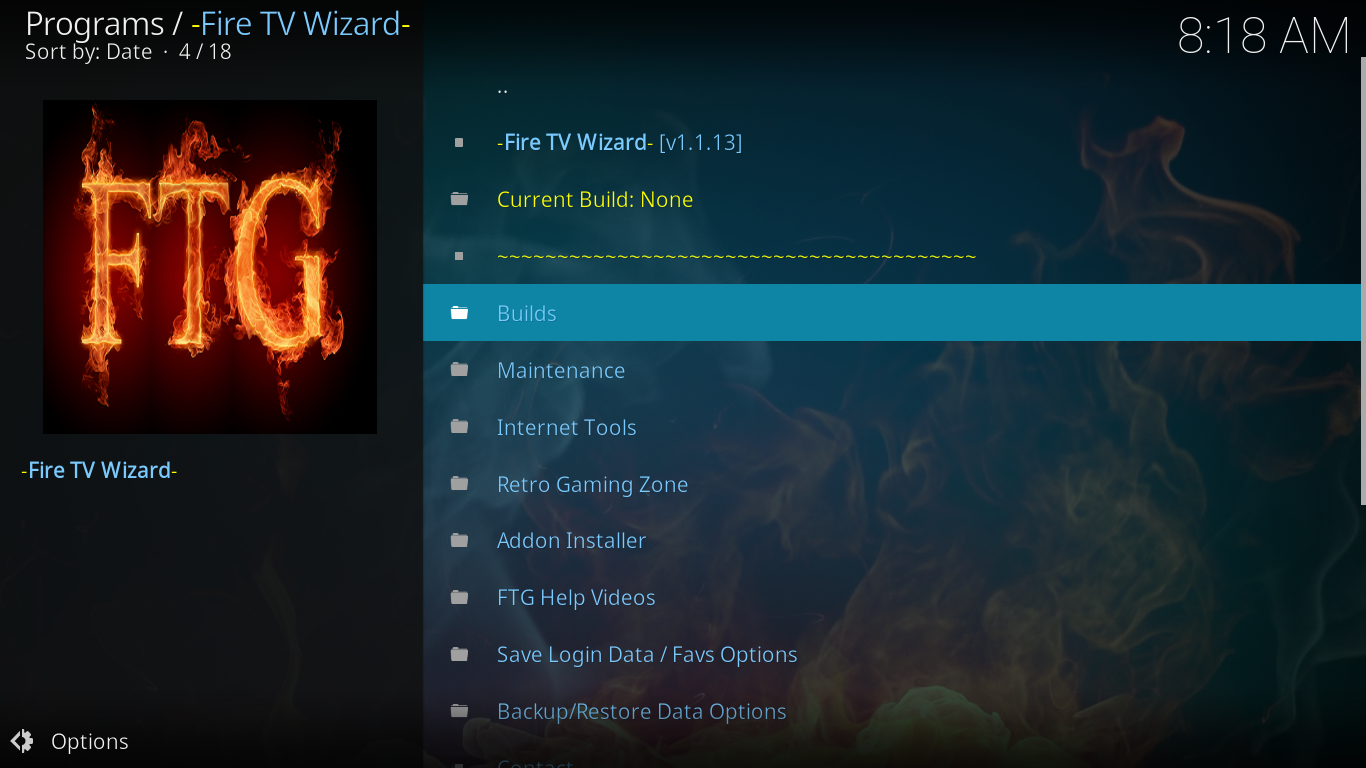
Step 17:- Then we need to choose the best builds that suits for our hardware. So click on builds option.
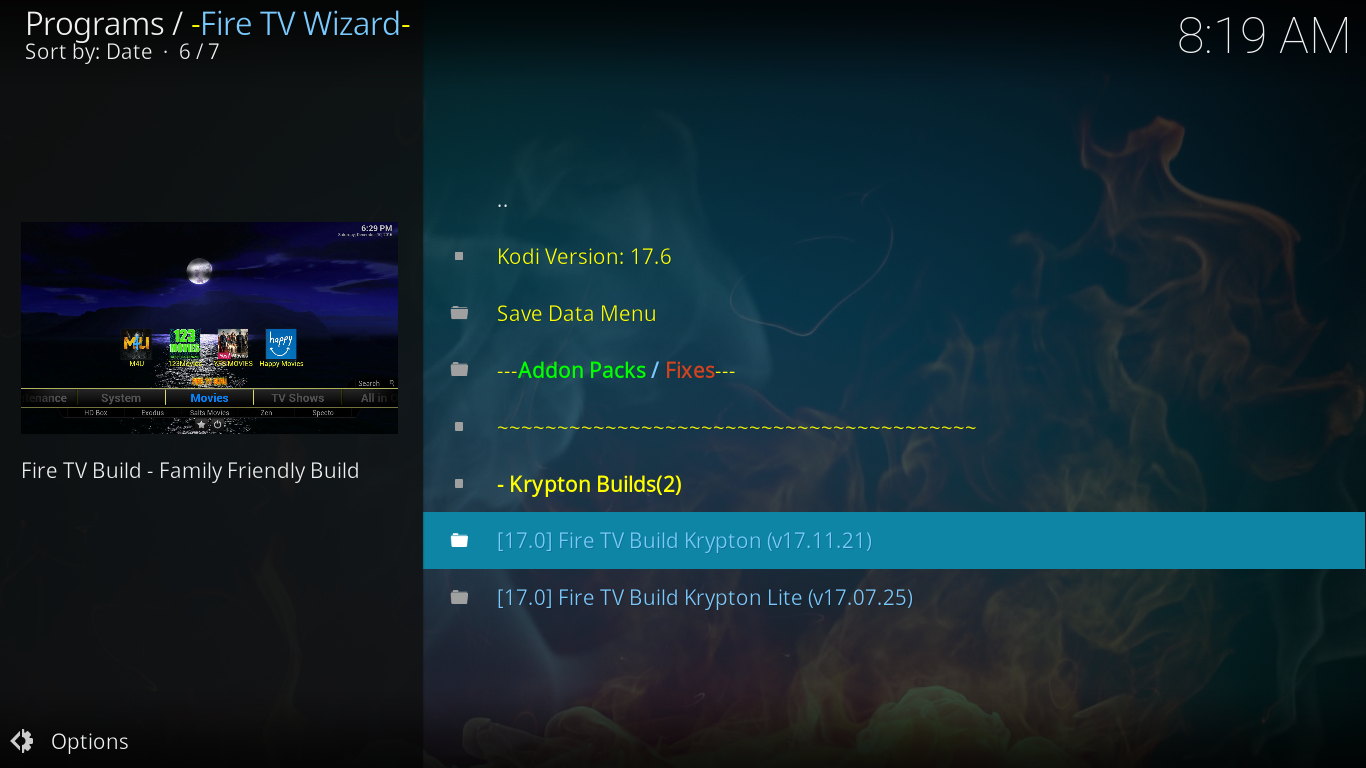
Here for my convenient, I choose the first option itself. If the first one doesn’t work, choose the second one.
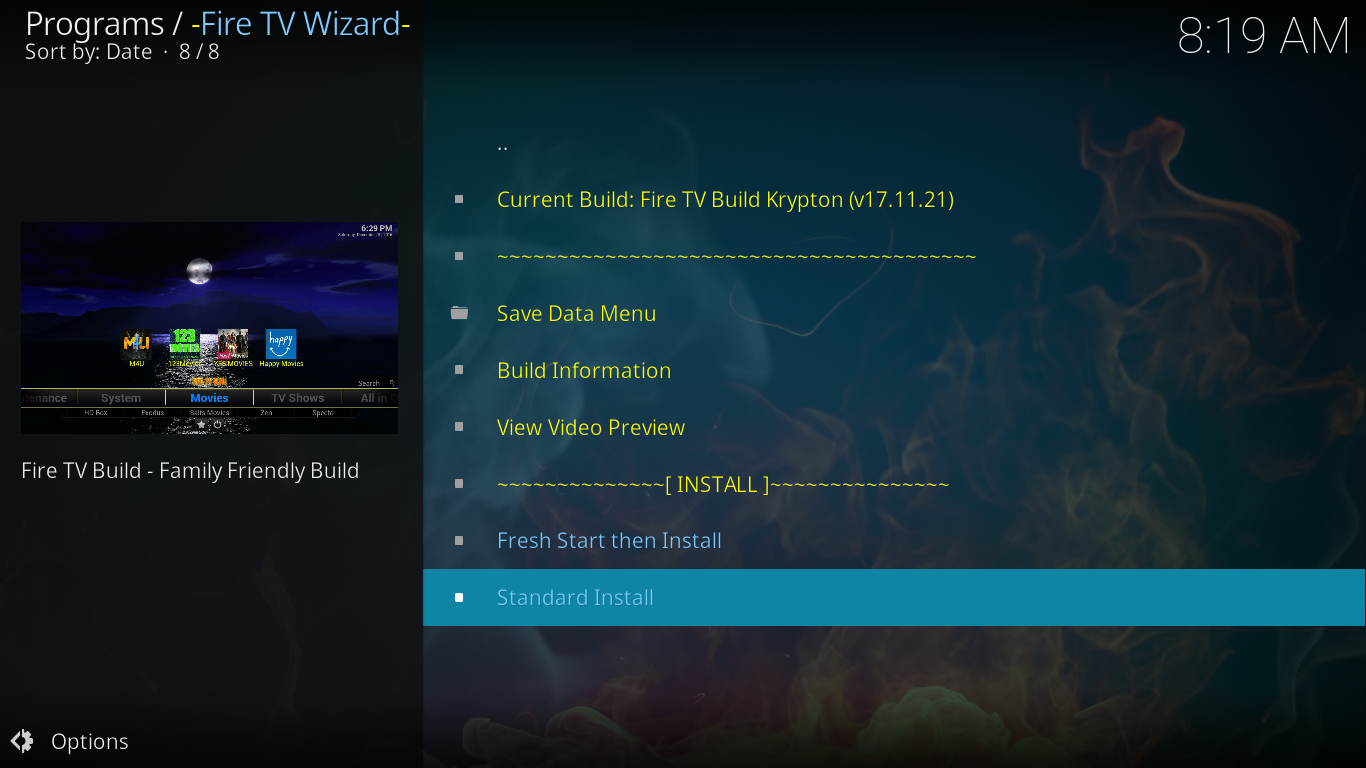
Step 18:- Then click on Standard install.
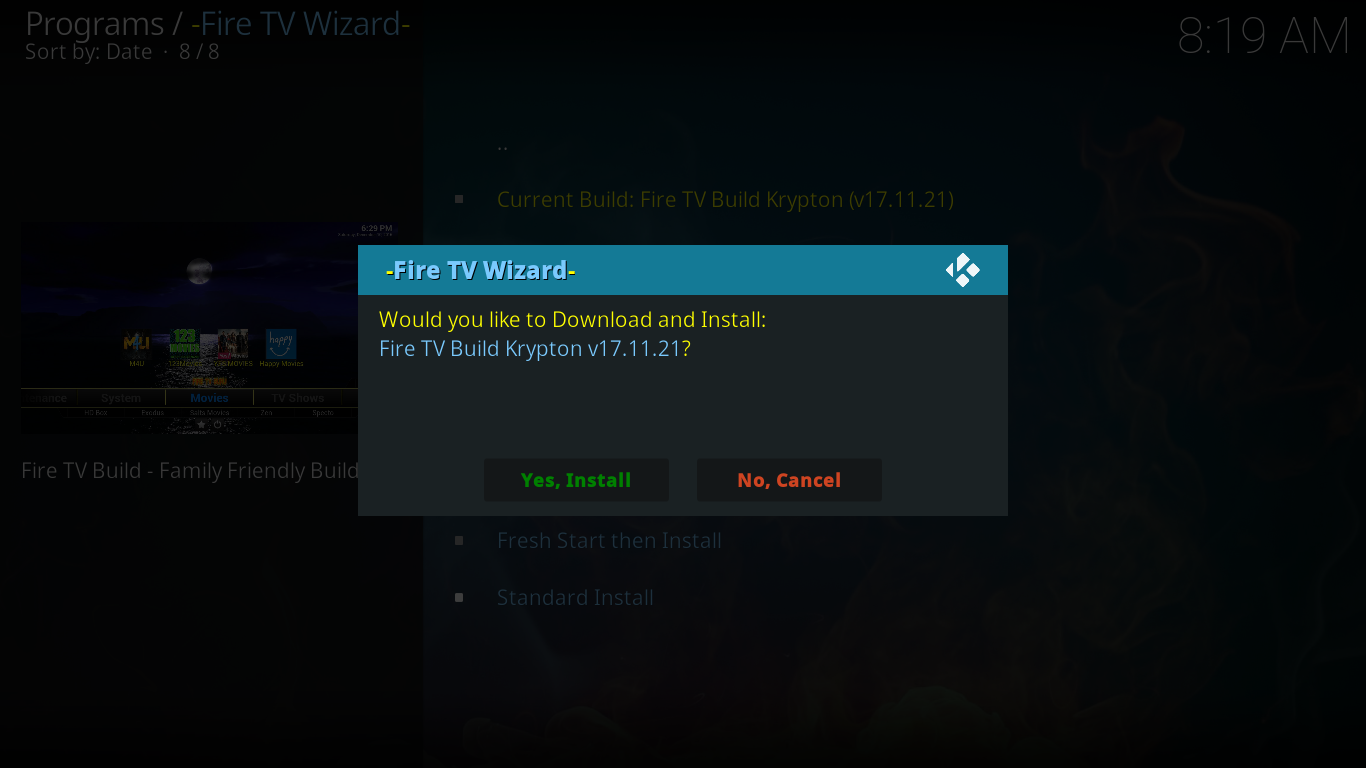
Step 19:- Then there will be a Pop up asking you to download the wizard. Please choose the Yes button.
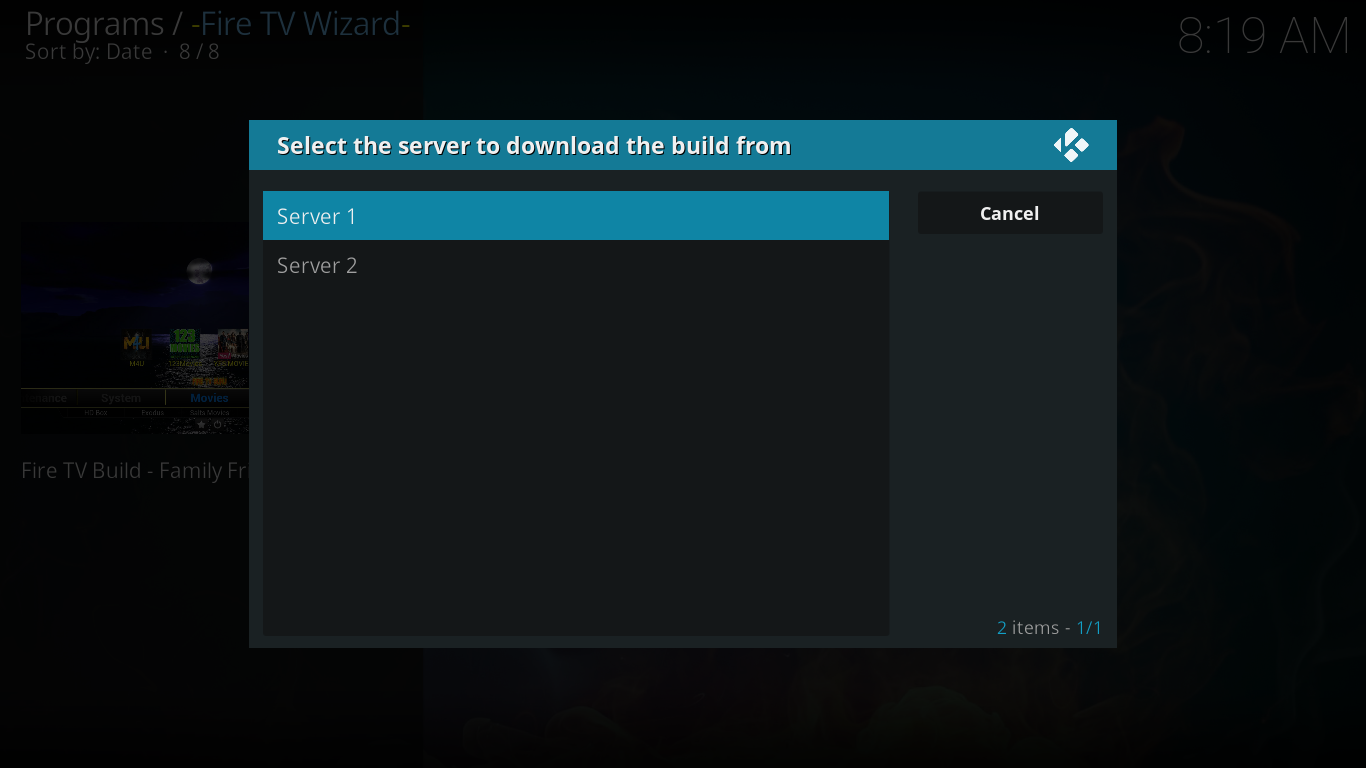
Step 20:- Then there will be some server lists. For me they show 2 servers. Sometimes there will be 3 or 4. Try it from the first server. If something goes wrong with the first server, try the bottom servers.
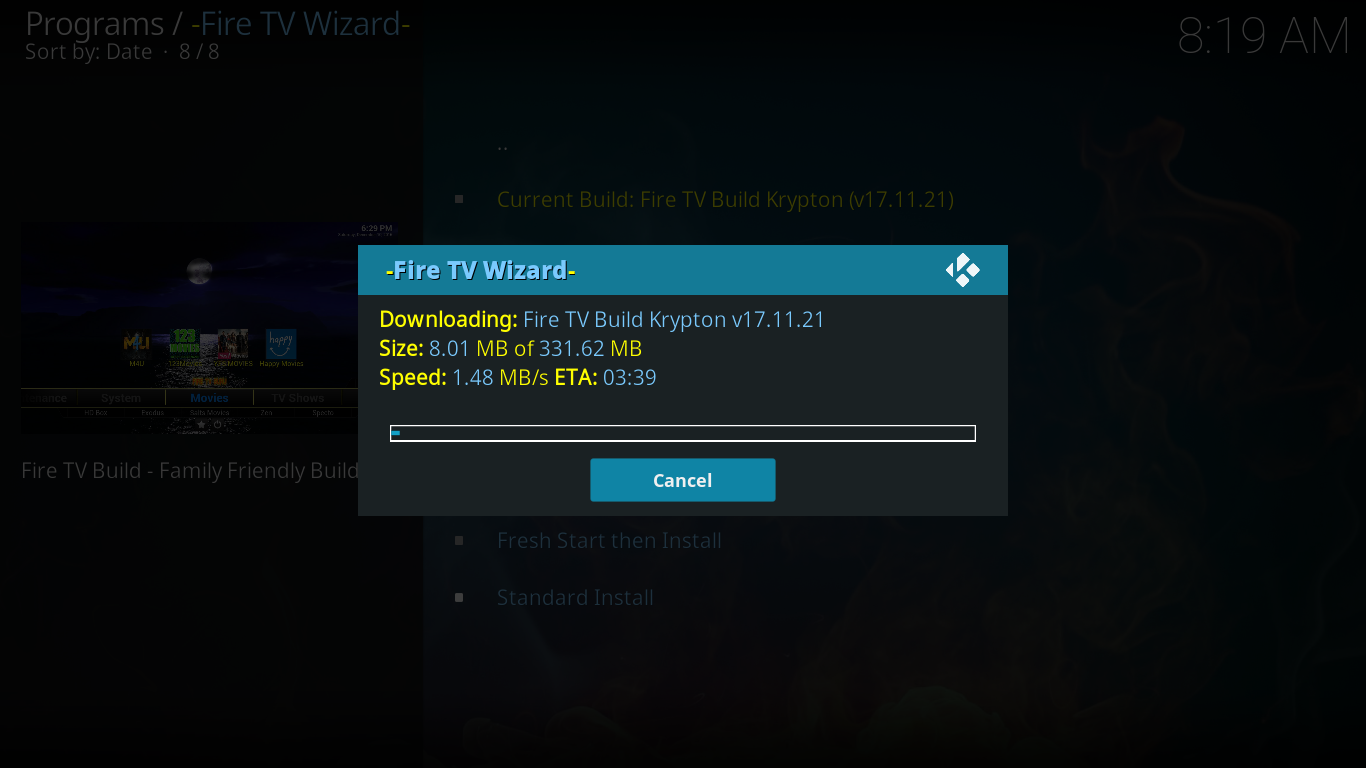
Now you can see the program add-on getting downloaded. Some times the Download speed will be very slow. It completely depends on the real-time traffic to the server. For me I got more than 1 MB/s quite good for downloading.
Step 21:- After finishing the download, there will be a pop-up box asking you to close and restart kodi. Just click OK and restart kodi.
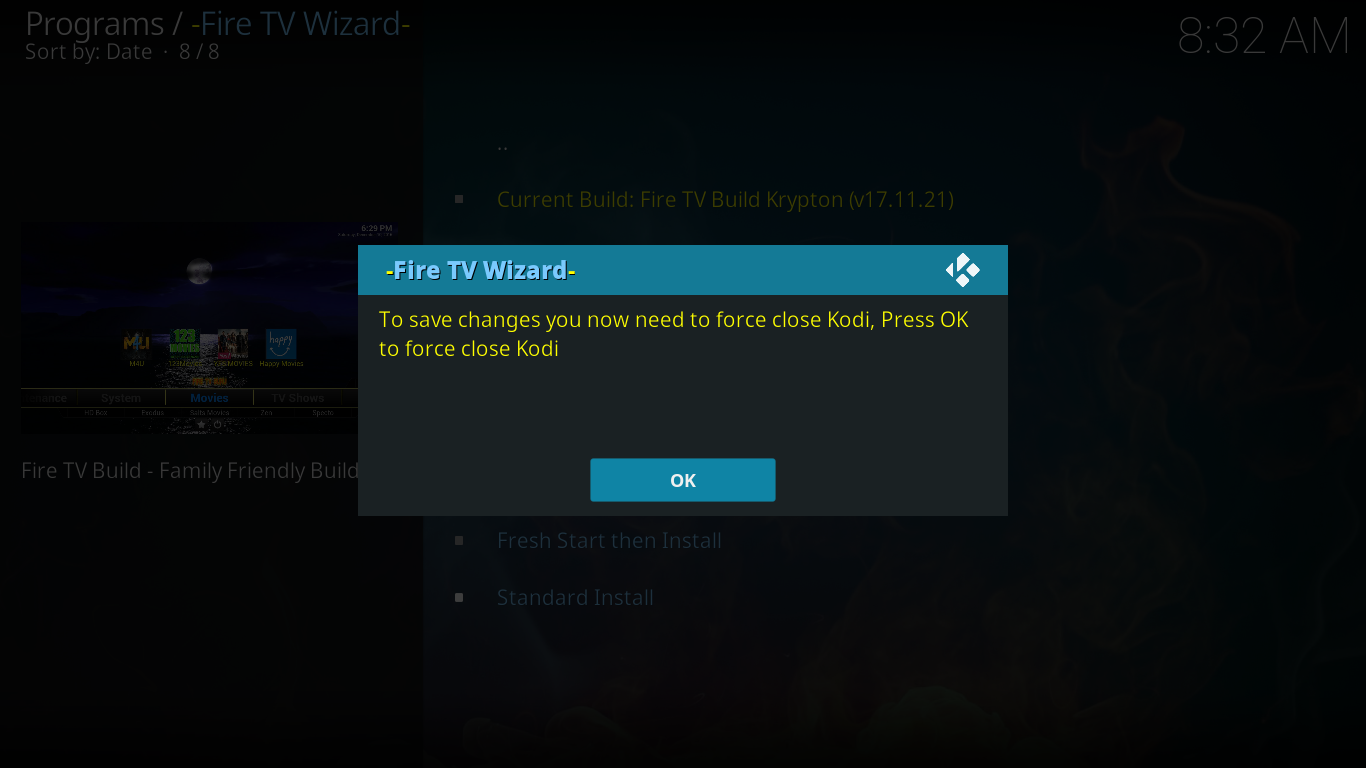
After restarting Kodi, you will see an entirely different User Interface. The features and functions will be entirely different.
Kodi Fire TV guru build Screenshots and Functionalities in a glance
Here are the few screenshots that I have gathered while using fire TV guru.
Some of the important streaming contents are
Streams Live Sports:- There are many channel links on Fire TV guru for streaming live sports. You can watch soccer, Cricket, Tennis and all other sports event live and sometimes highlights were also available.
Safe for Kids:- There are several add-ons available that are not safe for kids. But no such problems for this one. To gain attention of kids, there are several kids only program chart and streaming available.
Streams Movies:- This addon contains lots of movies. You will get regular update on new movies. Also holds hundreds of popular movies in HD quality.
There are many other builds contains collections of movies, sports, live streaming and kids content. Try all those and choose the best one that suits your needs. Fire TV Guru is just one of them. Thousands of people looks after this particular build. One big advantage is, the team behind this build is up to date. They bring all the links in working mode. Sometimes the servers are little bit slow. Anyway one of my favorite builds ever.
If you have any queries related to this addon, please feel free to ask.
I have a Sony TV with HDMI input sockets. Can I install KODI on a laptop computer running Windows 10 and then, using an HDMI cable, connect the laptop to the TV HDMI input and watch movies, etc. that way? Thanks.
Yes, it is possible. Following is an image of Kodi mirrored to my smart tv using HDMI cable.