Hello everyone, this is Jinson from techiestechguide.com and this is our first article in this blog. Today in this tutorial, we’re going to show you, how to set up a WordPress website using the Google Cloud Platform. I think this will be helpful for you, if you have an existing WordPress website that you want to move over to the Google Cloud Platform OR if you are starting a new WordPress website and are looking for a hosting provider.
All those are running a wordpress website have different choice regarding their hosting provider and here are some of the points that make sense for choosing Google cloud for wordpress hsoting.
- Cheap Plans:- You can host on Super fast Google Server for less than $5 a month. Definetly you can go for other plans too.
- Fast Servers:- In most plans they use SSD for hosting your website which loads the website quickly.
- Secure:- Nothing more to tell. Obviously Google servers are more secure than any other local hosting providers.
- More Uptime:- Your website will be available all the time.
Let’s see how to setup wordpress using google cloud.
Set up a WordPress website using the Google Cloud Platform
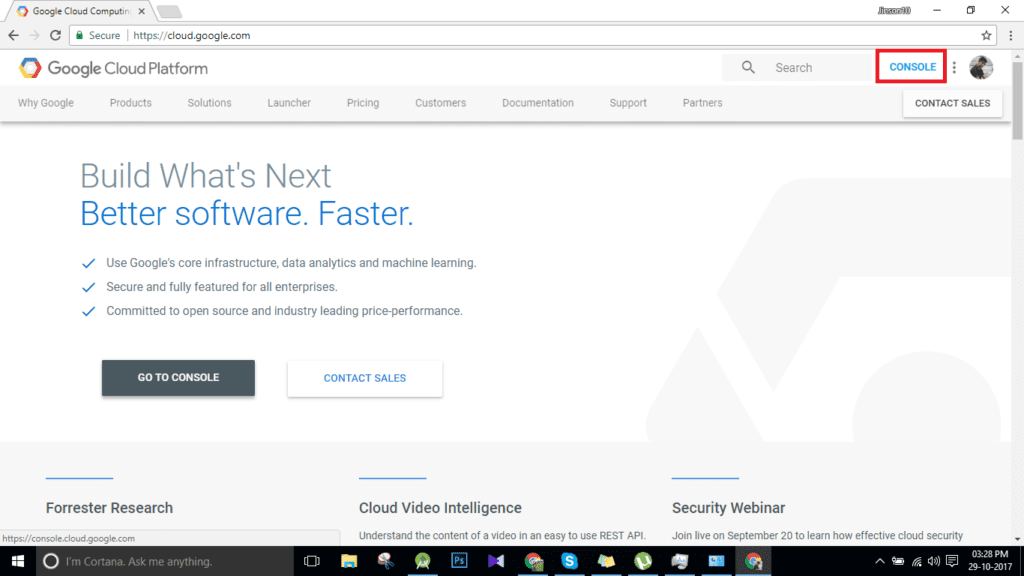
Step 1:- First step is to head over to the google cloud platform. You can type cloud.google.com in your webbrowser and can access google cloud.
If you are new to Google cloud platform, you need to fill some basic informations and other Payment detils. You do need to have a Google Cloud Platform account setting up an account is relatively straightforward. However I’m not going to go over those steps in this tutorial, so once you have successfully created an account head over to your dashboard on Google Cloud Platform.
Step 2:- Click on the console tab in the upper right-hand corner.
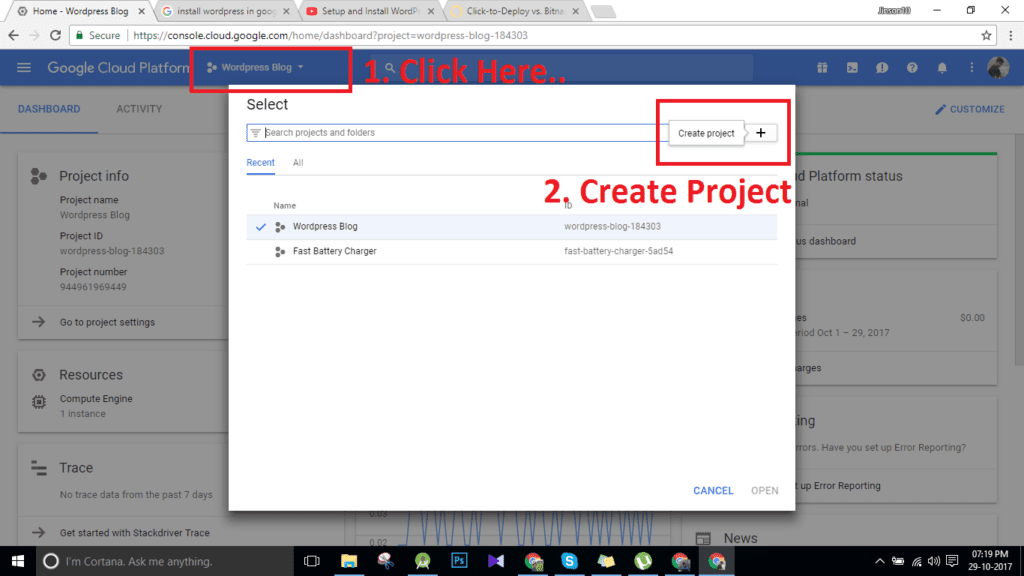
Step 3:- Now we’re going to “create a project”. See the screenshot below and Click on the ‘+’ Symbol to create a new project.
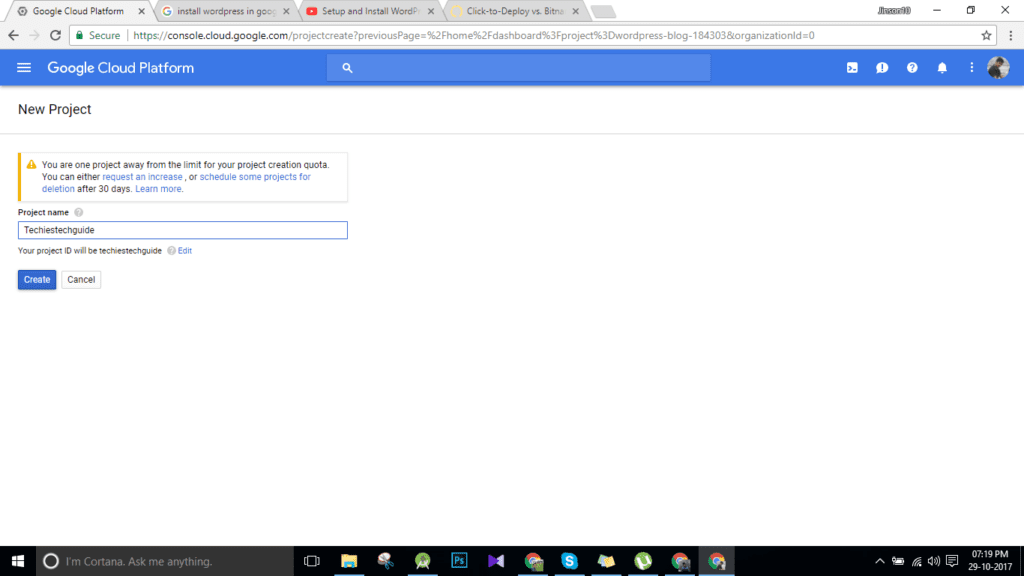
Now you need to give your newly created project a name. You can put in whatever you want. Here I used my blog name “techiestechguide”. if nothing is given, Google will come up with a unique project ID for you. Then click on create button.
In every case, it may took a couple of minute to get complete the creation of new project. After you create, you can see the new project similar to below image.
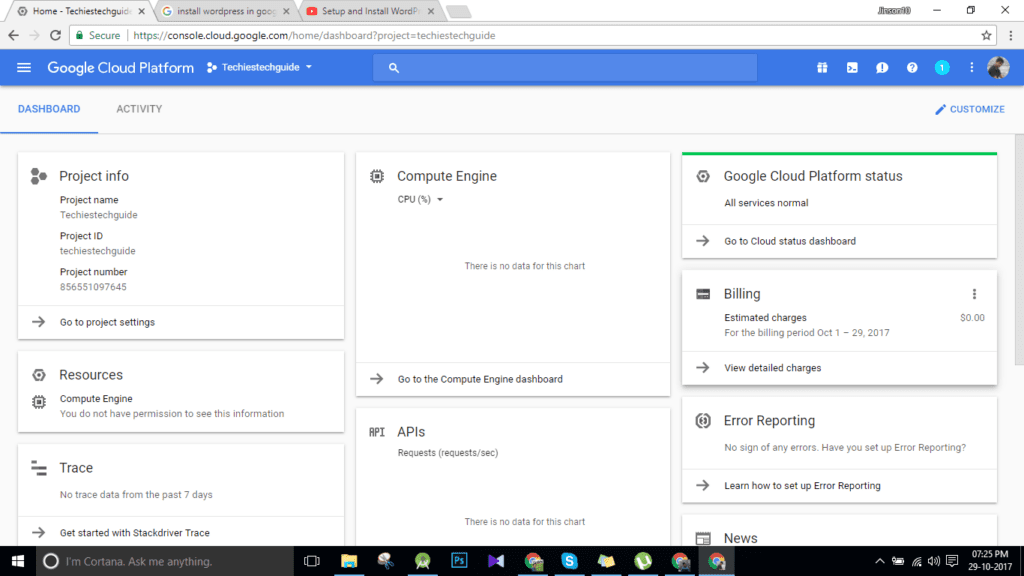
Step 4:- So once you’ve created your project make sure it’s selected as shown in the above image. Now its time to access the “Cloud Launcher”.
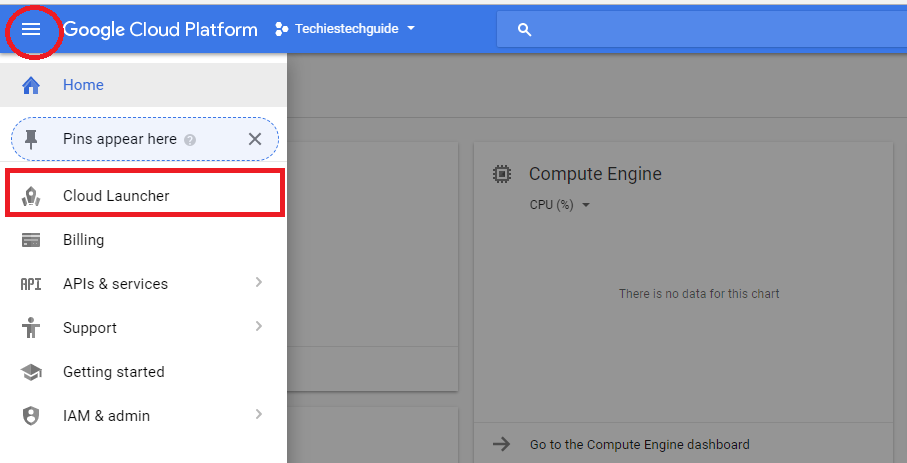
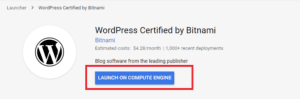
Step 5:- Once you click on the cloud Launcher, you could see a lot of features there. Among them you clold see one click installation for WordPress. You’ll notice simple WordPress and WordPress Certified by Bitnami. I always prefer WordPress by bitnami because it’s the most straightforward, cheap and easy to use.
Step 6:- Click on “LAUNCH ON COMPUTE ENGINE”
It may took a few minutes as you can see it in the window.
Step 7:- Now you can select whichever zone you prefer. For “Machine Type” I prefer selecting the “Micro 0.6GB” simply because it is the cheapest option. You can go for other options whatever you want. Now for disk type select the “Solid State Drive” simply because they are on average about 5-10x faster than the “Standard Persistent Disk”. and finally for “Disk Size” in GB select what size you want. 10GB is the least available option. Whenever you change the options, you could see change in the estimated monthly rate. Finally after selecting the options, click on “Deploy” Button.

Step 8:- Now this process does take a couple of minutes. Finally you can see WordPress has been deployed. On right side, you can see your WordPress URL along with Admin username and password.
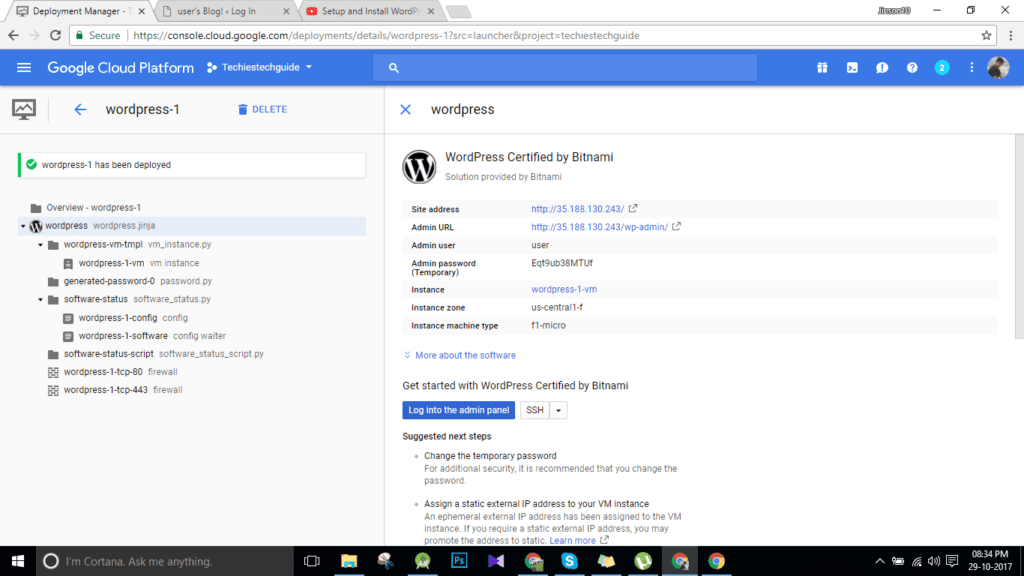
Take note your “admin user name” which is “user” and your “admin password” which is temporary. You can copy that password and write it somewhere. After your first login, you can change your admin password to whatever you like.
This is how you can install wordpress on google cloud platform. By default, there will be IP address on the URL. You can change it to any other domain name if you want. That tutorial will be given in coming days. You can also change http to https for your website.
If you have any queries reagarding this, please feel free to comment below. We will try to reply you as soon as possible.